 A reader wanted to know if I had changed what was on my System Repair Flash Drive from previous articles here, and here.
Those were from 2011, 2012. So, yes it has changed.
This is my take it with me system repair toolkit. I use YUMI exclusively to create this.
Please read the entire article before doing anything.
Although YUMI can download all supported ISOs, I suggest you download all the ISOs you want into the same folder before you start.
If you want to an ISO that isn’t listed try Unlisted Bootable ISOs. A Google search for YUMI + the ISO you want to use should help.
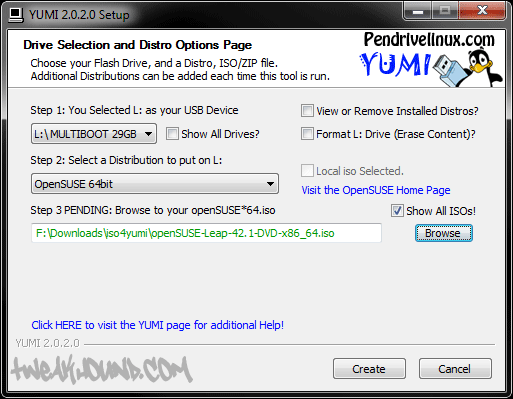
Many newer ISO’s will require you to check the Show all ISOs! box.
Download and start YUMI:
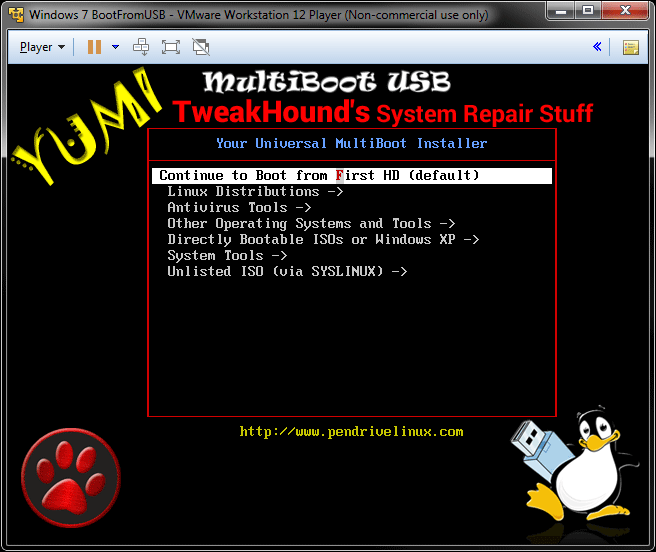
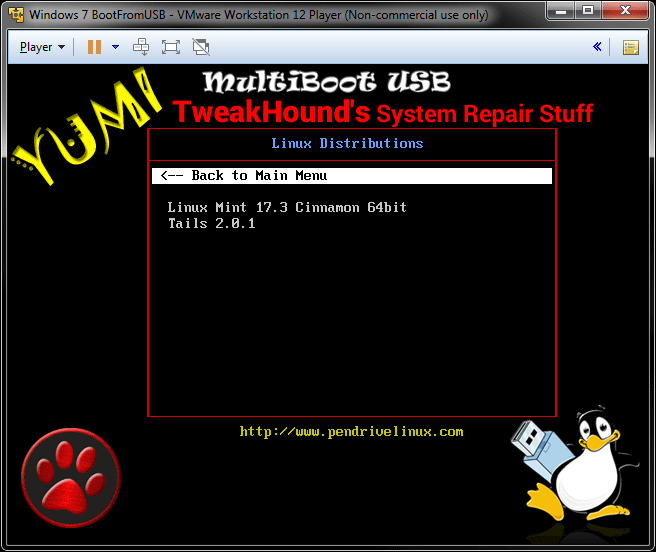
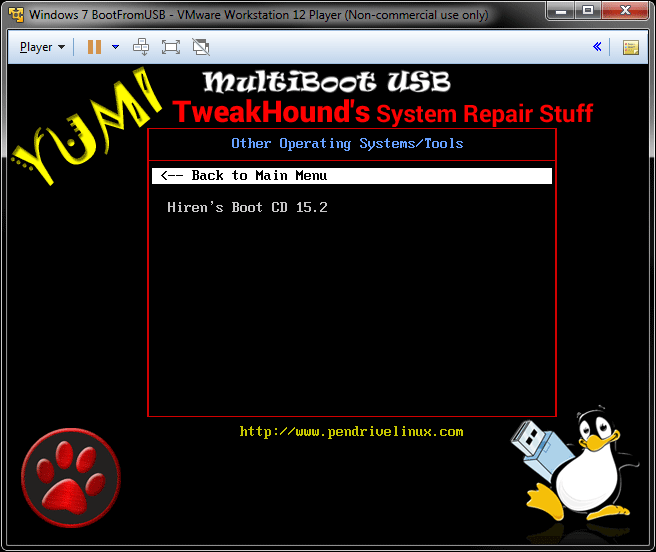
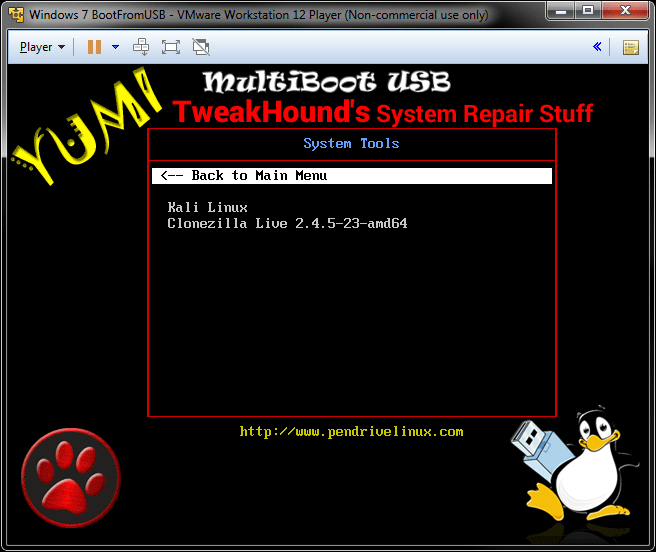
Here is my YUMI flash drive booting in a VM.
And yes, I modded the boot screen (Photoshop) as well as the Menus (Notepad++).
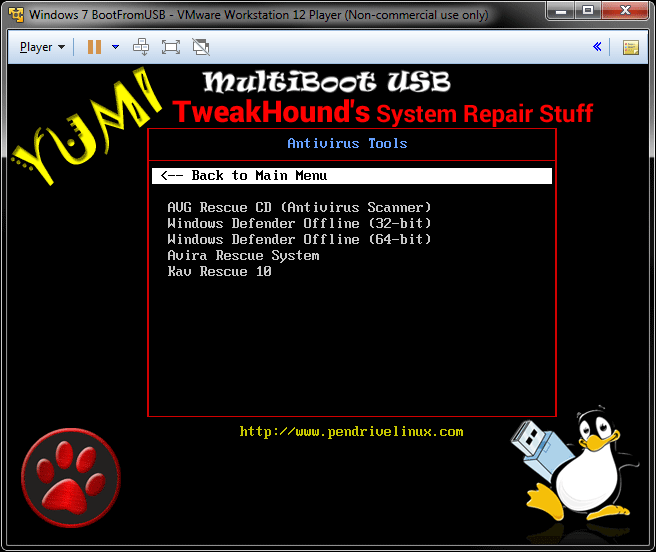
AVG Rescue CD
Windows Defender Offline
Avira Rescue System
http://support.kaspersky.com/us/4162KAV Rescue 10
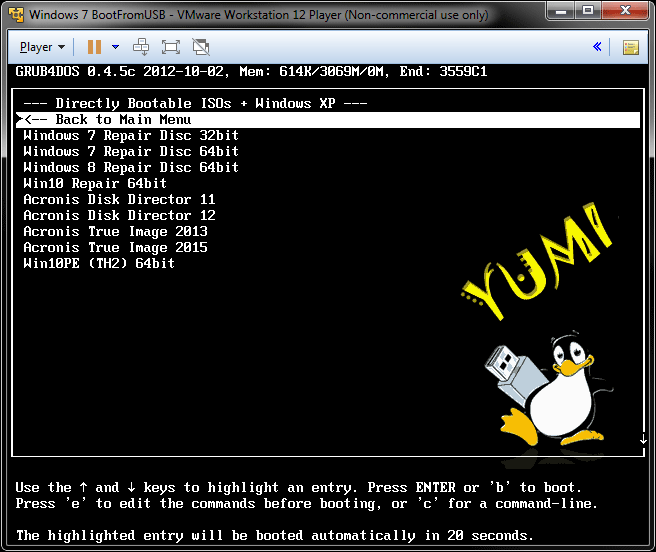
Windows Repair Discs – I make my own. Neosmart has them for download.
Acronis Discs – Get the from your Acronis account download page.
Win10PE
Also at the root of the drive I keep a folder called “stuff”. In that folder I have:
Cleaners
Bleachbit portable
CCleaner portable
Wise Disk Cleaner portable
Tools
NirLauncher
Sysinternals Suite
-END-
Thanks for this article. This will make it much easier when I need to fix somebody’s computer. I haven’t been feeling good so maybe I’m having a brain freeze, but I can’t figure out how to get a Windows Repair Disc in iso format without burning it to a disc first. The only options I’ve been able to find require you to write directly to a flash drive or directly to a CD or DVD.
I make a CD then use CPBurnerXP or ImgBurn to do CD to ISO.
Thanks. I was trying to get around using a CD, but I have plenty so it won’t kill me to use one.
Any tips getting the Windows Repair Discs to work. If I use Windows 10 installer for Win10PE and Windows 10 Repair Disc, then clicking on the Windows Repair Disc takes me into Win10PE. If I install either using Try Unlisted ISO (GRUB), then they have errors and don’t work.
Here are my menu entries:
#start Win10_repair_64
title Win10 Repair 64bit
chainloader /bootmgr
#end Win10_repair_64
#start Win10PE_x64_TH2
#Modify the following entry if it does not boot
title Win10PE (TH2) 64bit
find –set-root –ignore-floppies –ignore-cd /multiboot/ISOS/Win10PE_x64_TH2.ISO
map –heads=0 –sectors-per-track=0 /multiboot/ISOS/Win10PE_x64_TH2.ISO (hd32)
map –hook
chainloader (hd32)
#end Win10PE_x64_TH2
I will retrace my steps later this week.
My menu looks the same. I also tried adding a Windows 8 repair disc and that also boots me into Win10PE. If you can think of something I’m missing that’s cool, if not, I will give up on having the Repair Discs on my Yumi drive. I have a Windows 10 installer on another flash drive which gives me the option to go into the repair menu, so I will keep that drive with my Yumi drive on my key ring.
Another thing I noticed is that Win10PE 64 bit boots up and then goes blank on my PC with 32GB of ram, but all the other machines I tried it on had 16GB or less and it worked fine. I’m backed up with Acronis, so I can live without it working on my machine if I run into any issues.
Besides the above issues, this repair drive is still great and I’m glad you posted this. I haven’t been able to do everything I wanted to with Yumi, but having a flash drive with Hiren’s Boot CD, Win10PE, Acronis True Image and Disk Director, and all the Antivirus tools you posted is awesome.