
This guide will show you how I dual-boot and multi-boot openSUSE 12.3 with Windows 7 and/or Windows 8.
The method I use keeps Windows in charge of the boot process. To achieve this I use a program called EasyBCD.
I’ve chosen to show all the screenshots of the install as both a guide and to show how easy installing openSUSE is.
You must you pay close attention to the steps in this guide.
In particular I will mark critical steps with: ***critical step
The following free software was used for this guide:
EasyBCD – for dual / multi-booting. If you do not want to register then just click the download button.
openSUSE 12.3 – My favorite Linux distro. Release notes are here.
VMware Player – I used my Windows 7 virtual machine to create the dual-boot scenario for this guide. This allowed me to show you the installation screenshots.
Q – Why do you recommend EasyBCD instead of GRUB?
A – Several reasons:
1 – The web is littered with woes dealing with GRUB. Granted many of these are user errors but still.
2 – My philosophy on dual or multi-booting Linux and Windows is to not let the systems interact with each other. That means I do not mount Windows OS partitions in Linux and vice versa. This philosophy extends to the bootloaders as well.
3 – Product lifecycles. Windows 7 came out in October of 2009. Support will end in 2020 making the lifecycle approximately 11 years. openSuSE 12.3 came out in March of 2013. “openSUSE releases have a lifetime of 2 releases + 2 months overlap. With a release cycle of 8 months this makes it 18 months.” Do the math. How many times will you have to risk your bootloader?
4 – Using EasyBCD is quick and easy.
Part 1
Download and install EasyBCD. You do not need to configure anything yet.
Download openSUSE 12.3. Burn your CD (I suggest CDBurnerXP) or create a bootable flash drive.
Part 2
Prepare your Windows drive.
First defrag your drive.
***critical step – Next press the Windows + R keys and type diskmgmt.msc ( or go to Administrative Tools > Computer Management > Disk Management ).
Right-click on your Windows drive (usually C:) and choose Shrink Volume…
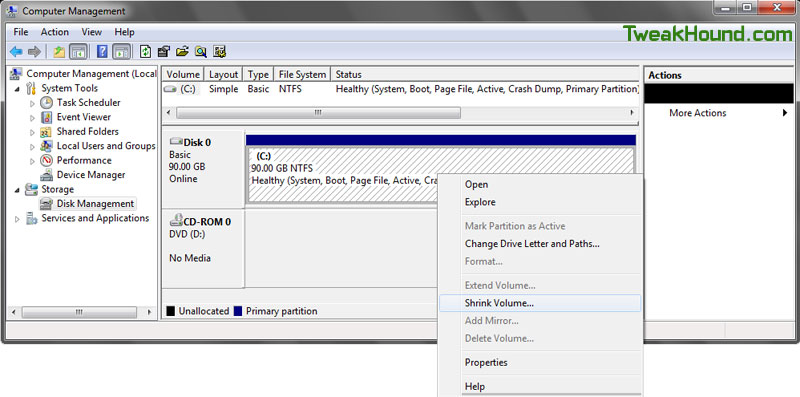
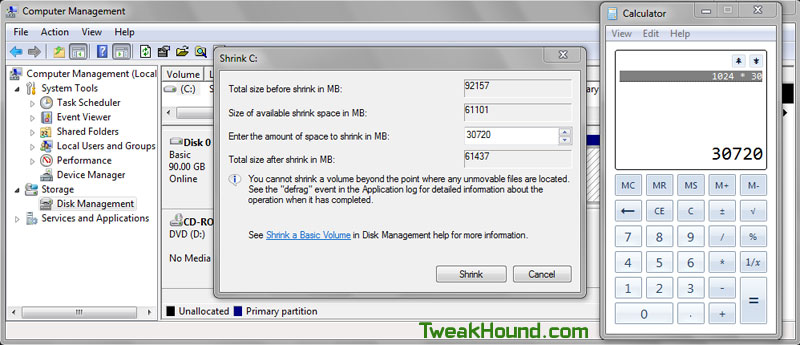
Now choose a size for openSUSE. In this example I wanted a 30GB partition. The size you choose is up to you.
Please note that we are just creating the space. DO NOT create a partition.
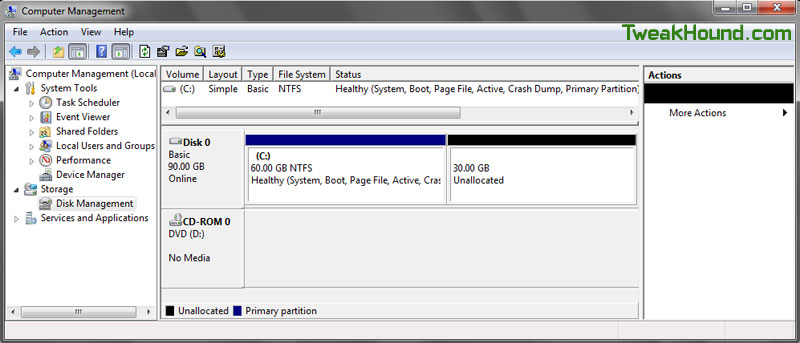
When finished reboot your computer and boot up the installation media (CD, DVD, or flash drive).
Part 3
Installing openSUSE 12.3
On boot choose Installation.
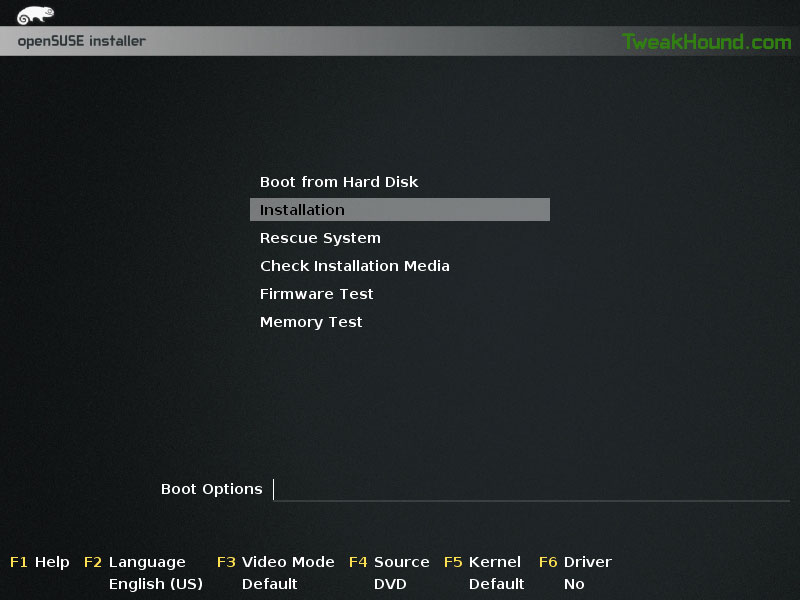
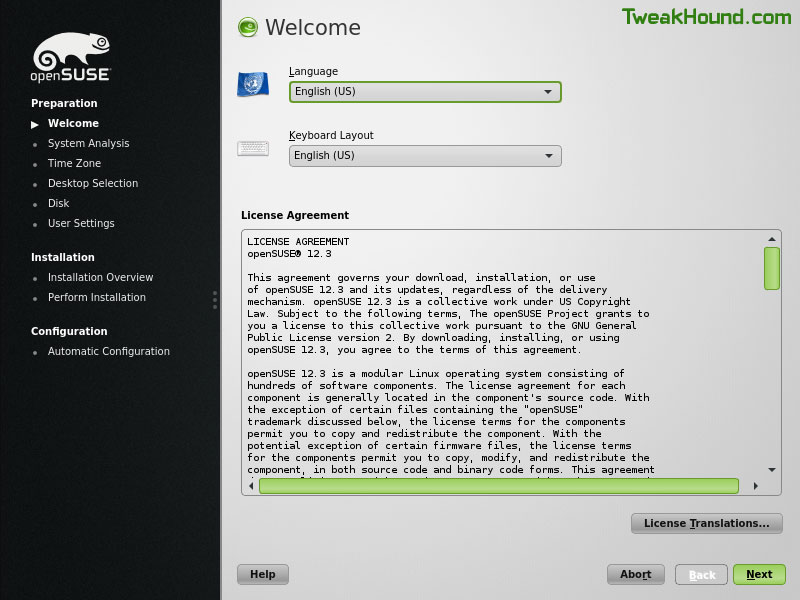
Click Next
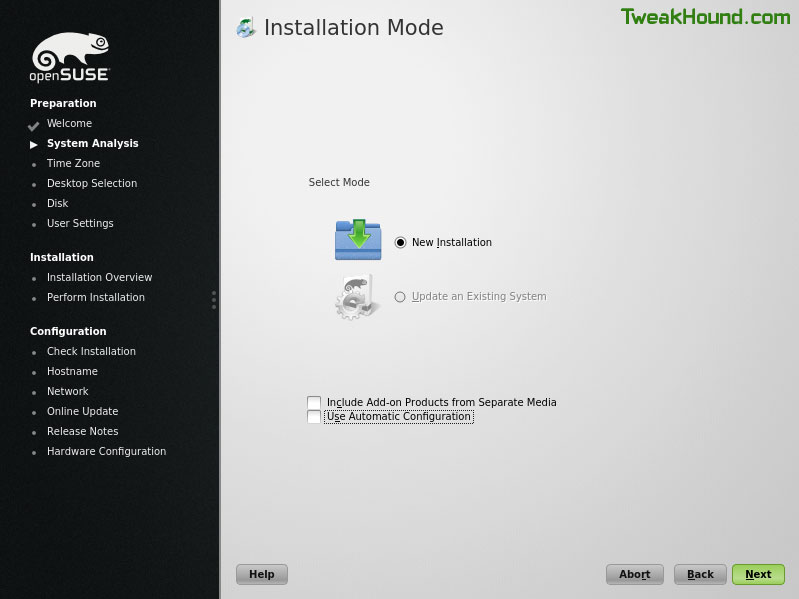
***critical step – We are doing a New Installation. Uncheck Use Automatic Configuration
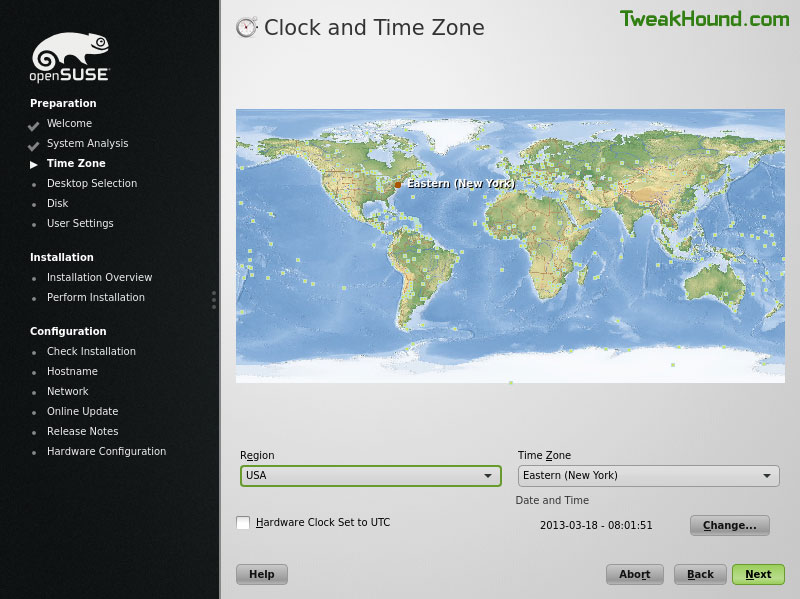
Click Next
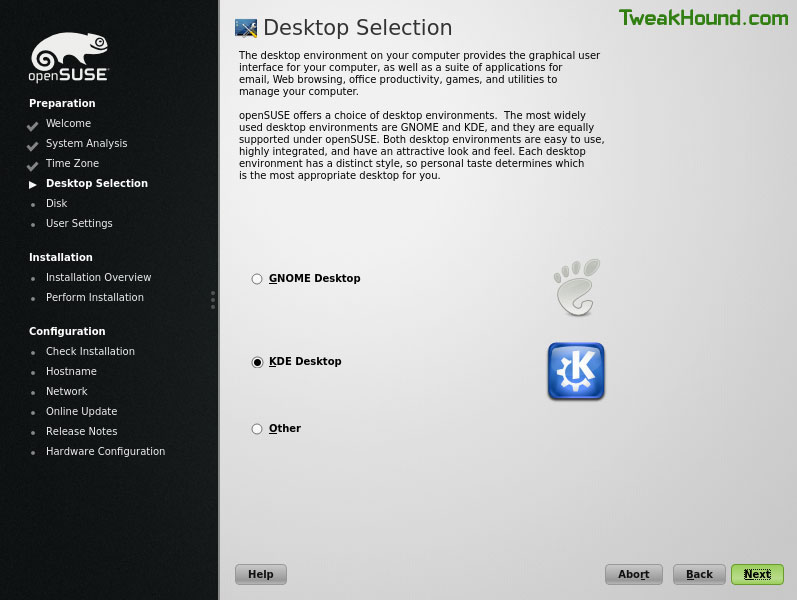
My desktop of choice is KDE. You can choose whatever you like and click Next.
If you followed the previous steps in this guide then I promise you openSUSE will find the empty space on your drive and configure this for you.
If so click Next. Important – SSD users see next step.
If not then your going to have to do it manually (beyond the scope of this guide).
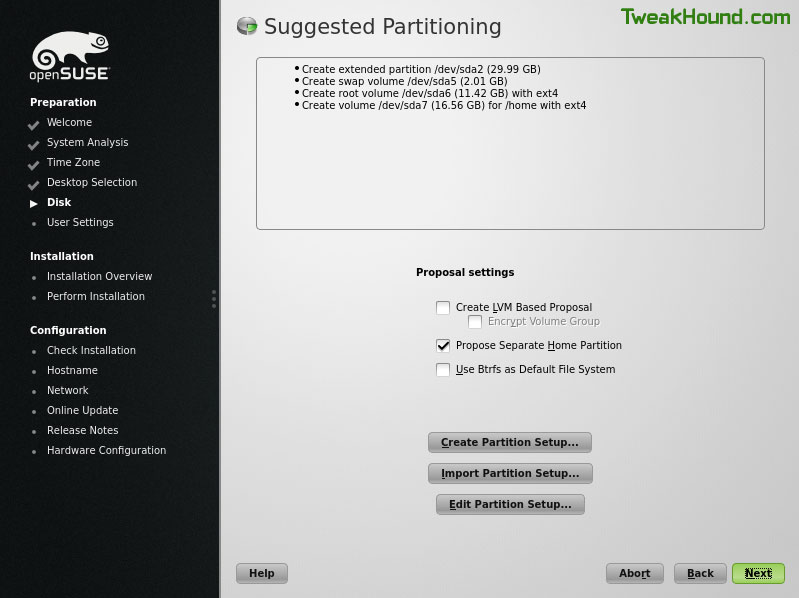
SSD users. To optimize the partition for SSD’s click the Edit Partition Setup… button.
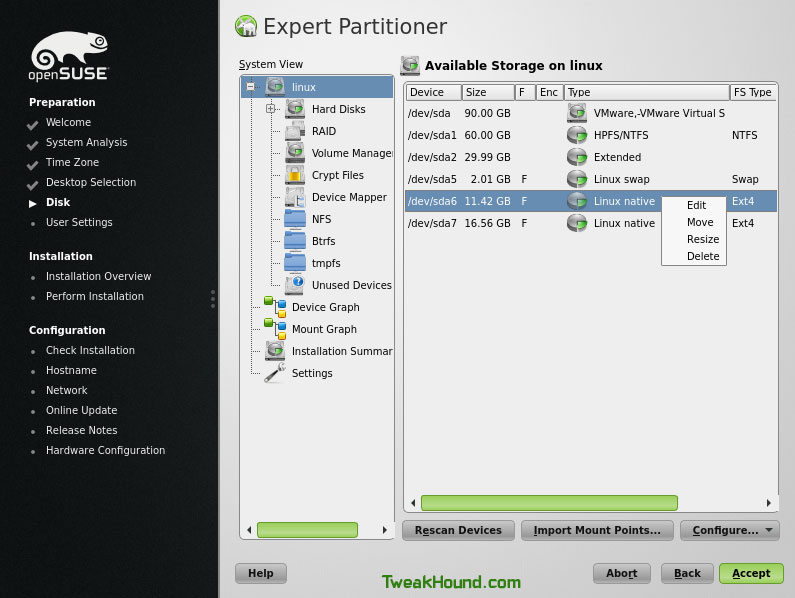
Right-click on the / partition and choose Edit.
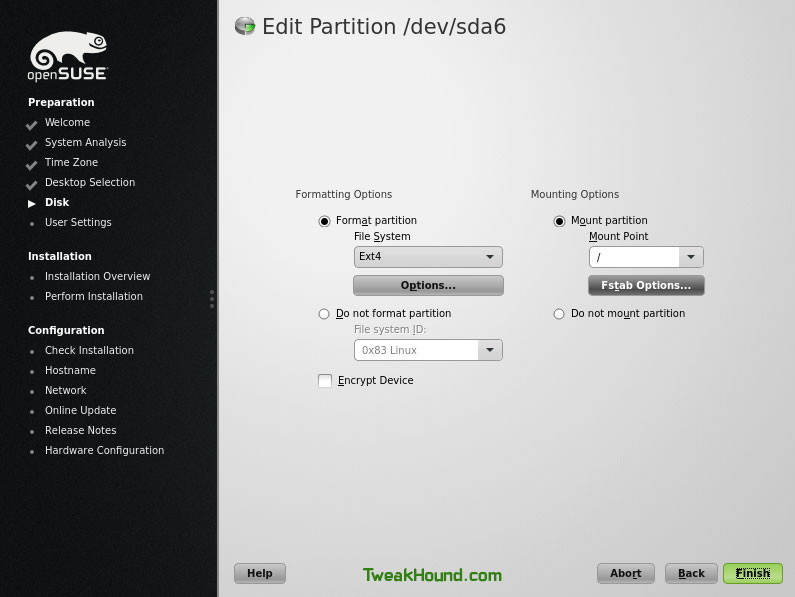
Click the Fstab Options… button.
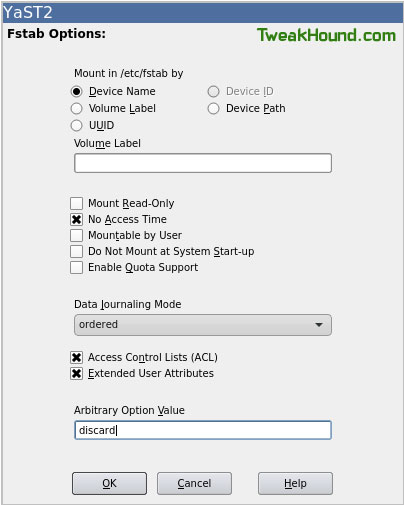
Click the box next to No Access Time. Kinda like Windows Last Access timestamp (NtfsDisableLastAccessUpdate), see here for info on this setting).
In the Arbitrary Option Value box type discard. This is like the Windows trim command. See here for more info.
Click OK, in the resulting screen click Finish.
Repeat these steps for the /home partition.
Once both partitions are done click Accept in the Expert Partitioner window.
Continuing on…
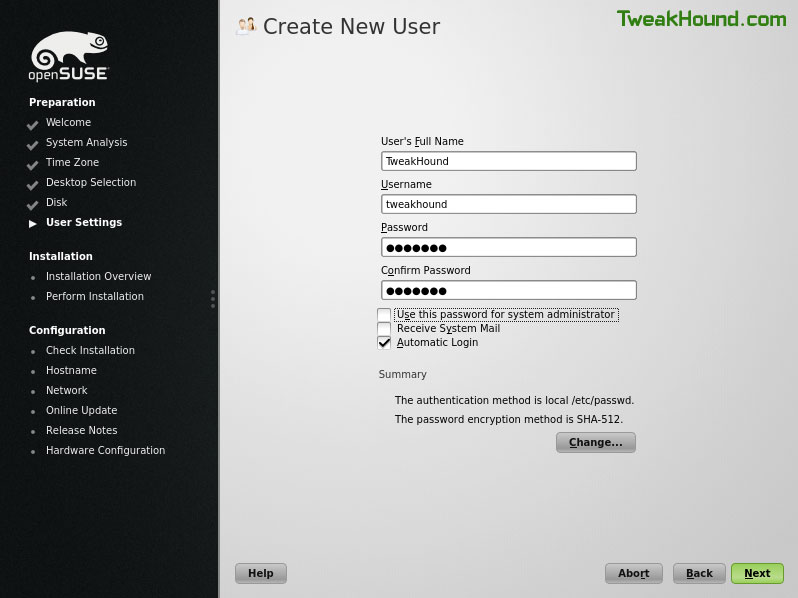
Fill in the info. I use a separate password for system administrator (root) but it isn’t necessary. Click Next.
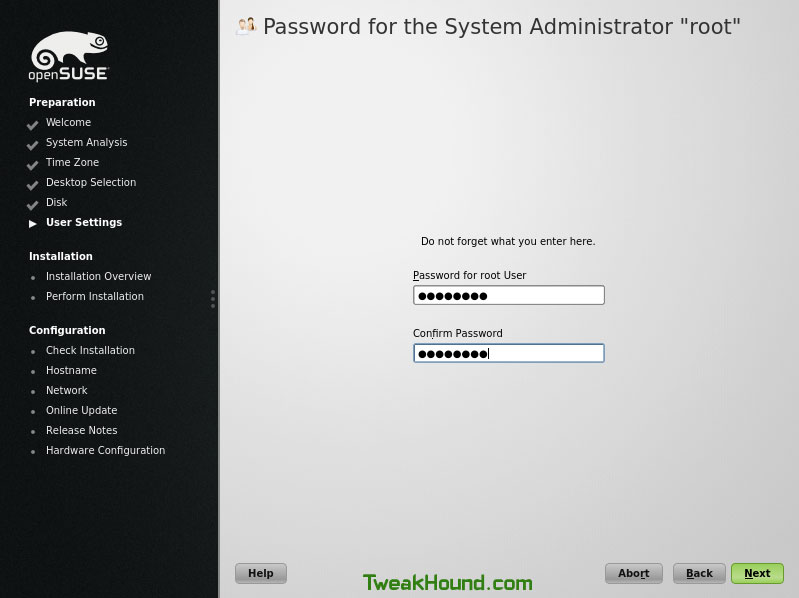
If you are using a different password for Root enter it and click Next.
***critical step
It is essential you follow these next steps exactly.
Click on Booting.
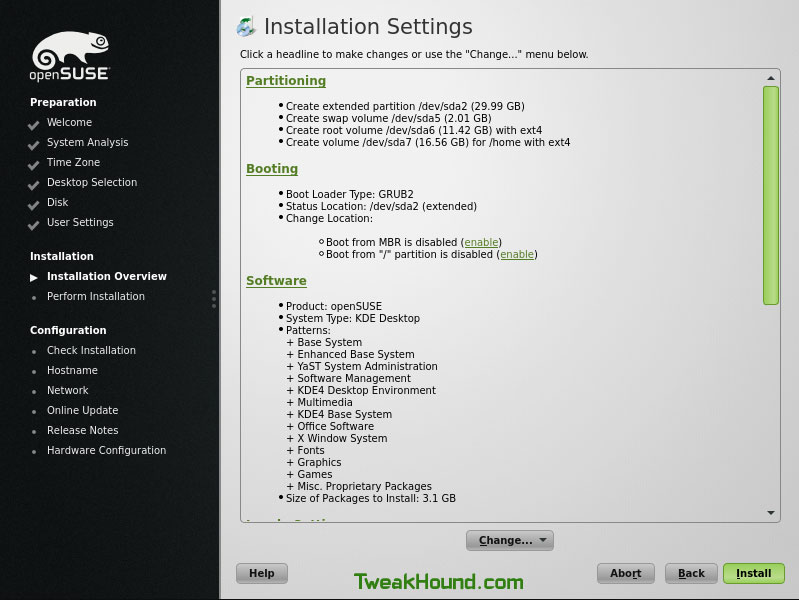
***critical step
Uncheck Boot from extended Partition.
Check Boot from Root Partition.
Click Boot Loader Options button.
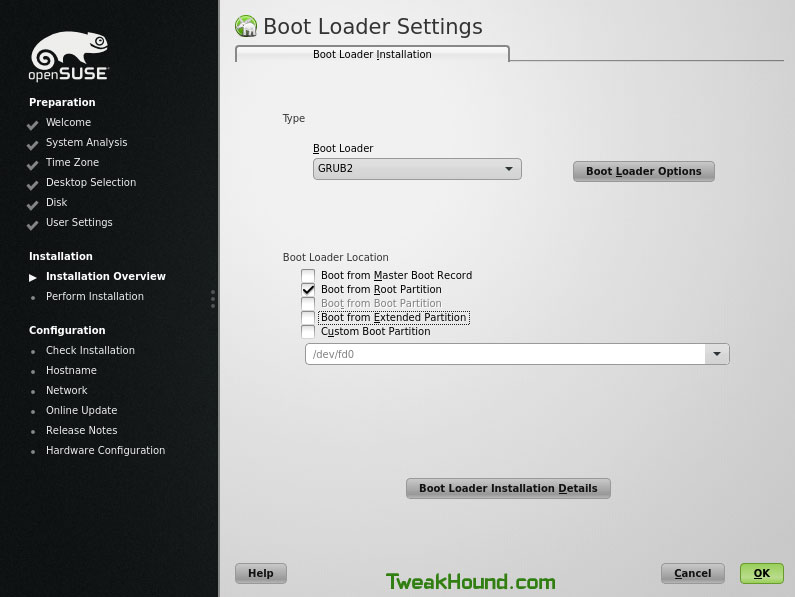
***critical step
Uncheck Set active Flag in Partition Table for Boot Partition.
Optional step – Change the Timeout in Seconds.
Click OK when finished.
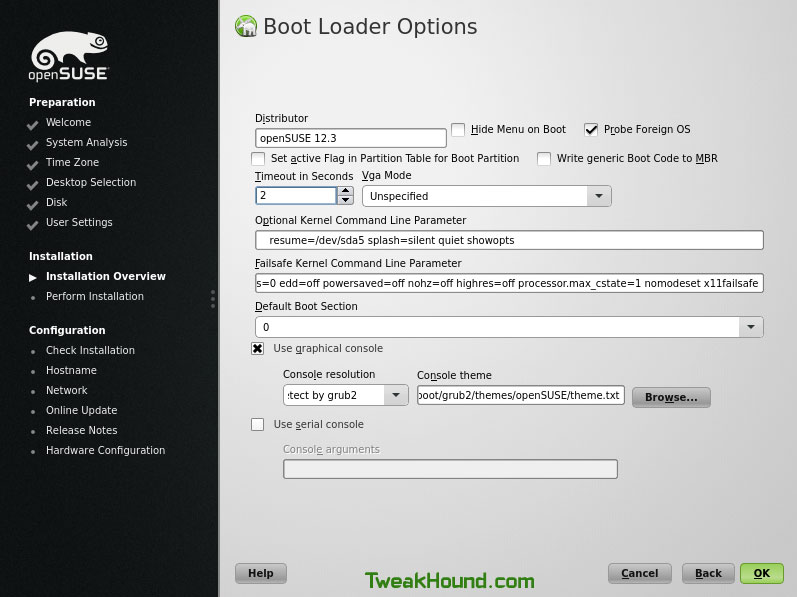
Back at this screen click OK

Back in this screen you can adjust software options or not.
Click Install to proceed.
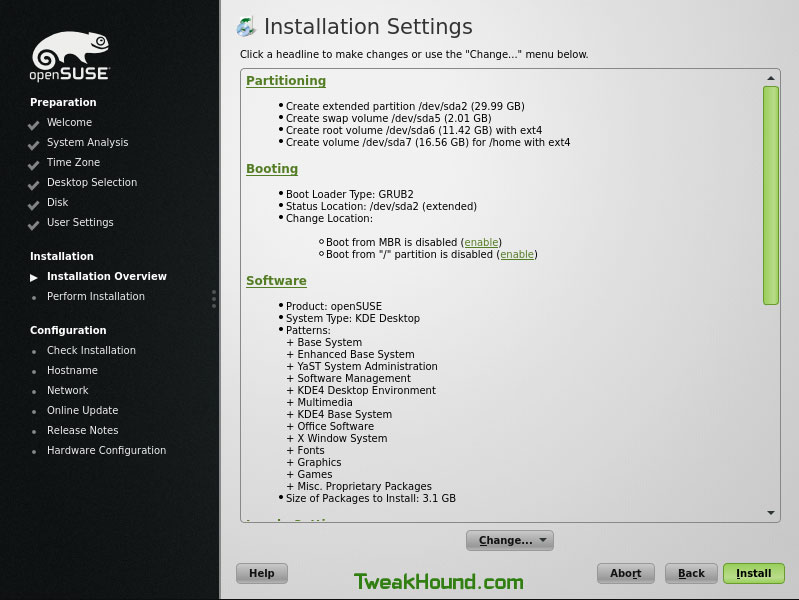
Part 4
After the initial install the system will reboot and you will be in Windows.
***critical step
Start EasyBCD. Click Add New Entry. Click The Linux/BSD tab.
Choose Grub 2 in the Type box.
Type openSUSE 12.3 in the Name box.
Select your root (/) partition from the drive box.
Click Add Entry.
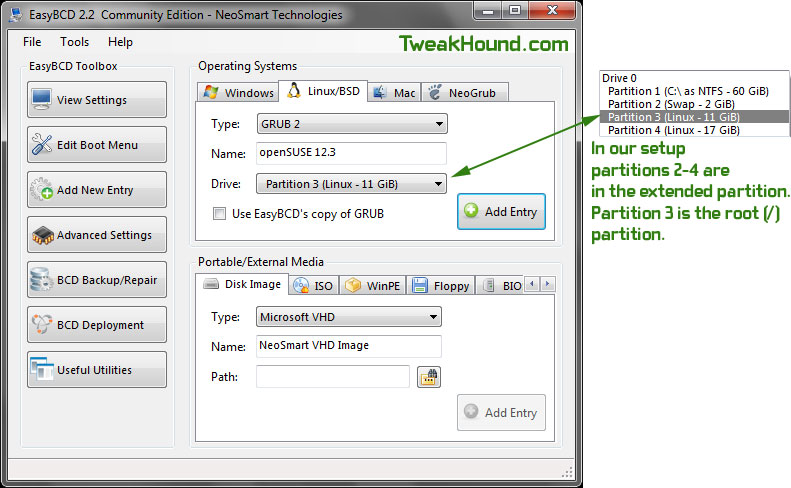
Now click the Edit Boot Menu button.
Check the box next to openSUSE 12.3.
Optionally change time in the Count down from box.
Click Save Settings.
Reboot.
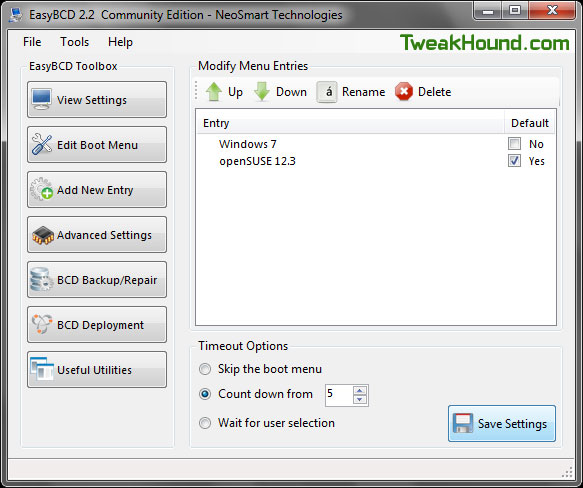
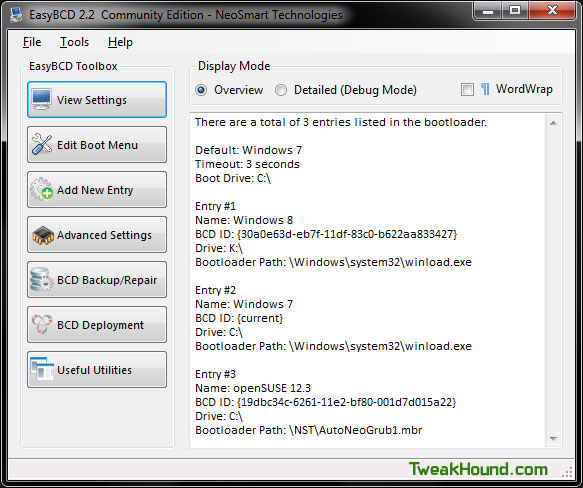
What it looks like on my computer. Multi-boot Windows 7 / Windows 8 / openSUSE 12.3.
Part 5
openSUSE will continue the installation.
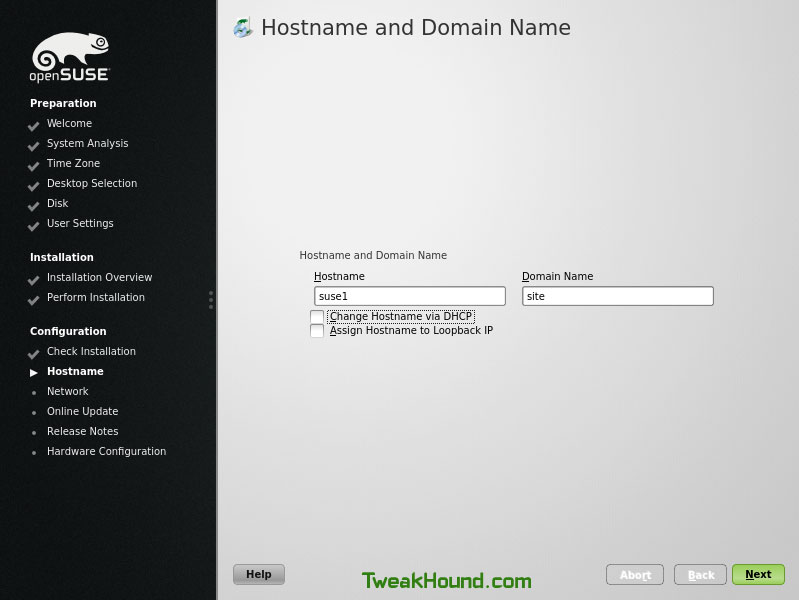
Pick a Hostname and click Next.
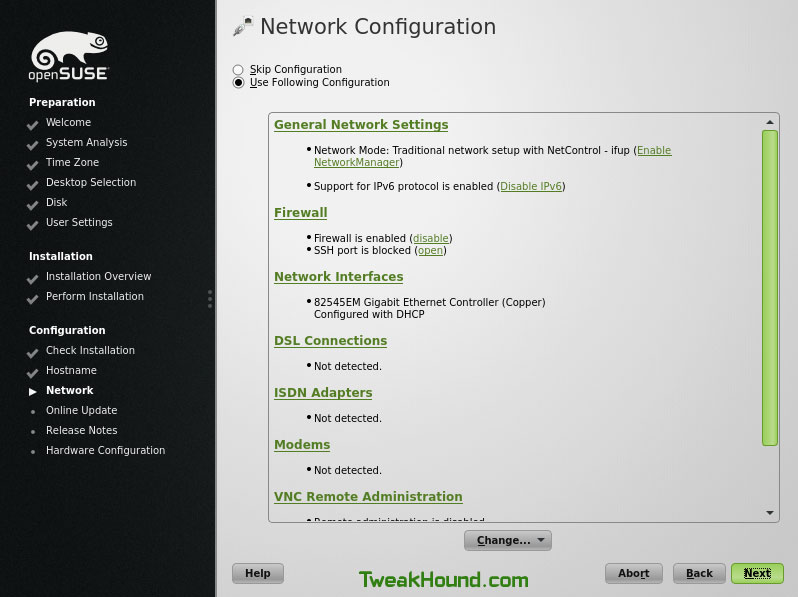
Under General Network Settings:
For a computer with a single network interface the option here is usually ifup.
However some folks have noted a bug with this. If in doubt you can choose Enable NetworkManager.
Click Next.
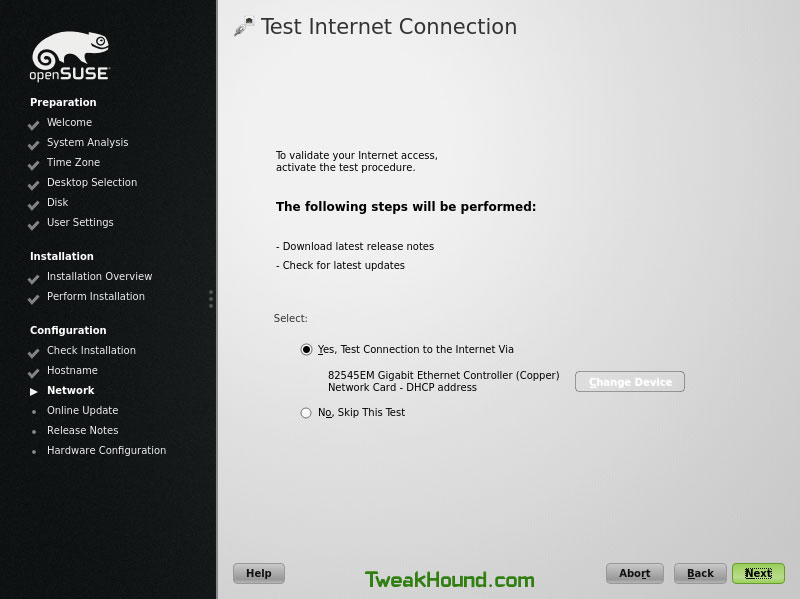
Click Next. If the internet connection test fails then click back and follow the advice above.
Click Next.
Click Next.
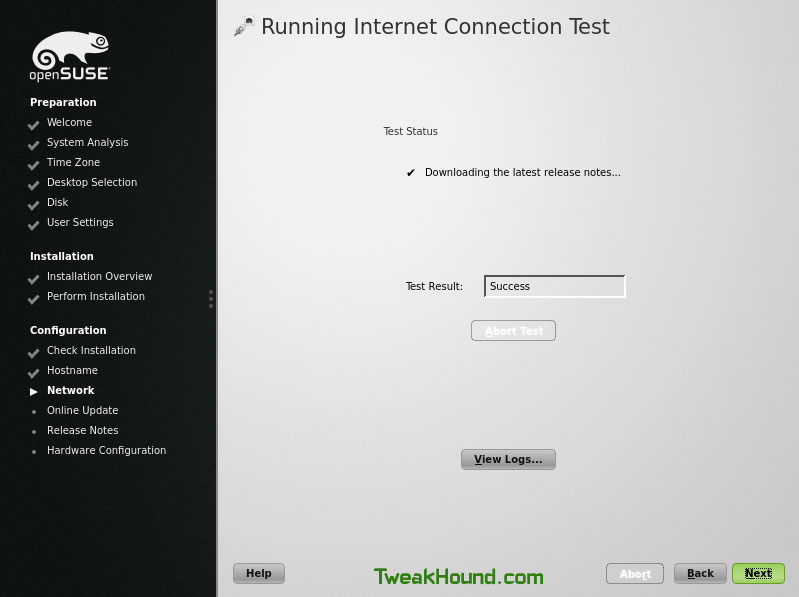
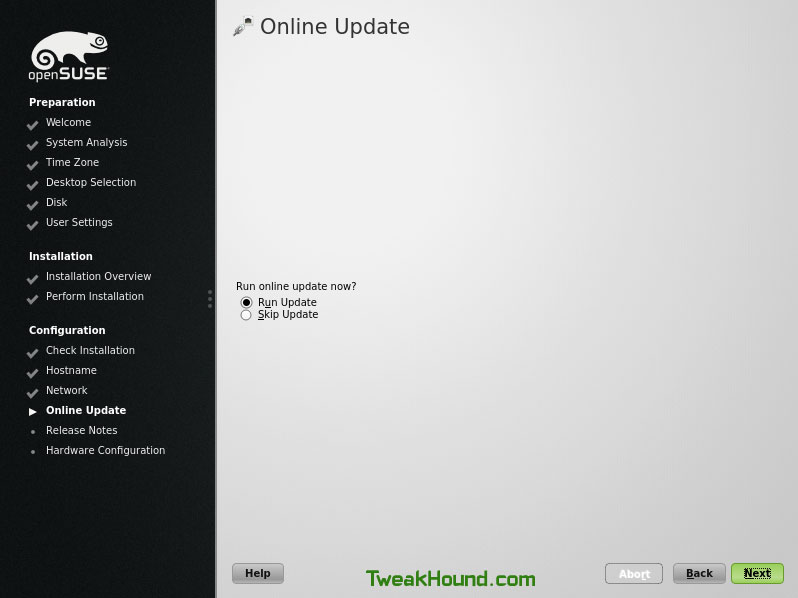
Yep. Update it.
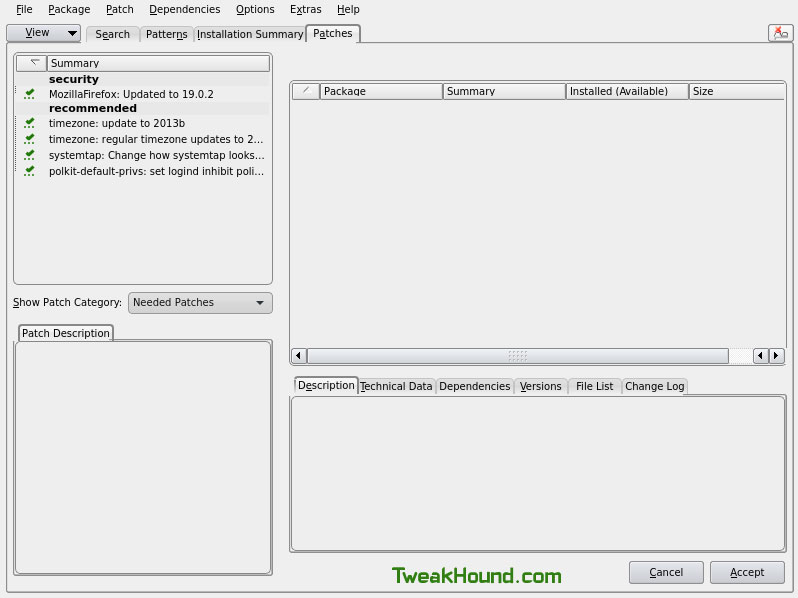
Click Accept.
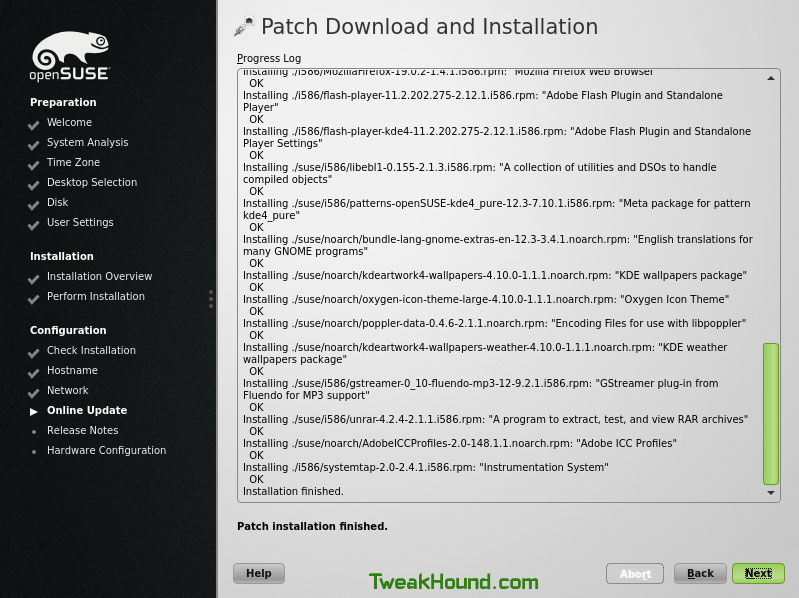
Updates done.
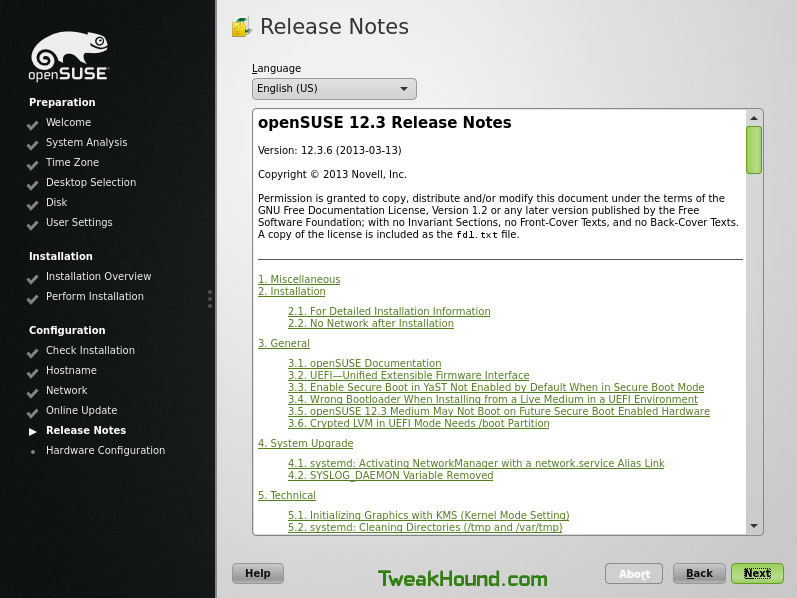
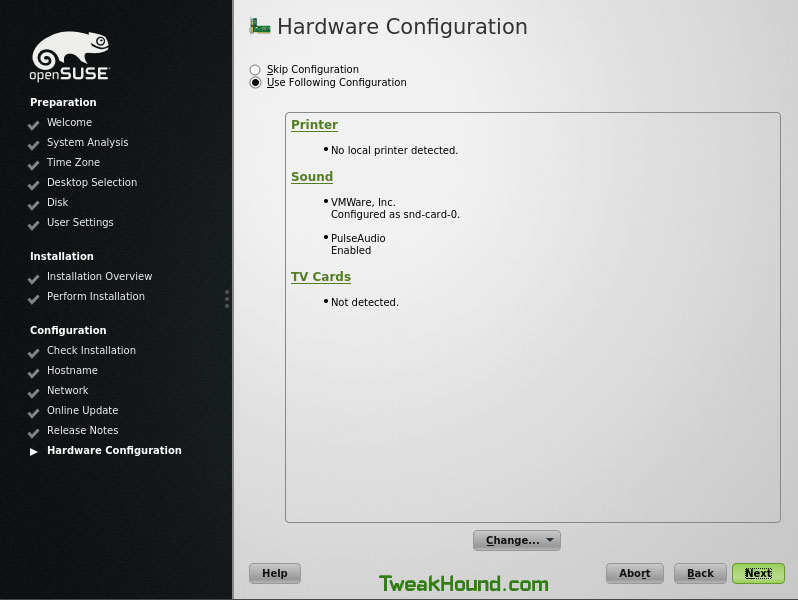
New users probably shouldn’t do anything here. These options configurable later if needed.
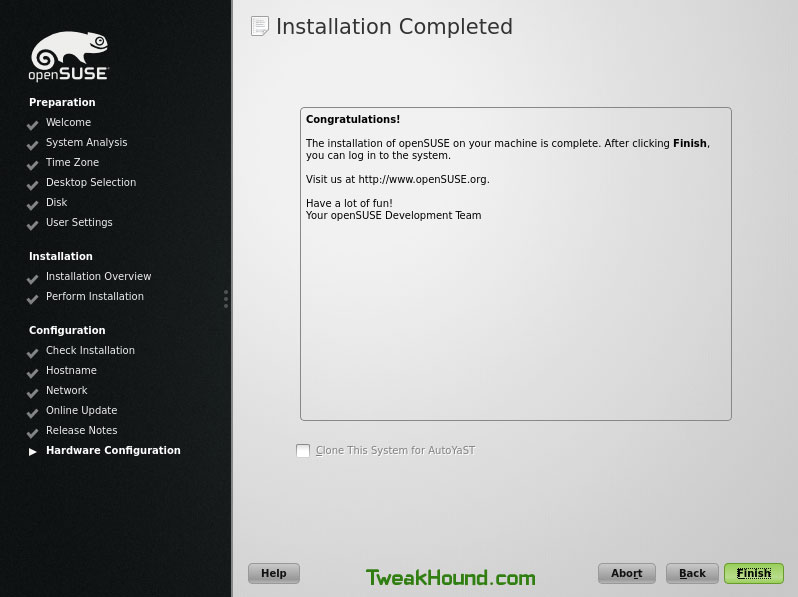
All done! Click Finish to start openSUSE 12.3.
-END-