
Please read through this entire guide before doing anything.
Before Purchasing Windows 7
You'll see articles/posts/blogs around the web talking about the minimum
requirements to run Windows 7. Geeks have always considered Microsoft's minimum
req's to be a joke, the general rule of thumb for Geeks has been take the
minimum and double it. Note the word MINIMUM, bottom line is the faster machine
you have the better Windows 7 will run.
-1 gigahertz (GHz) or faster 32-bit (x86) or 64-bit (x64) processor
-1 gigabyte (GB) RAM (32-bit) or 2 GB RAM (64-bit)
-16 GB available hard disk space (32-bit) or 20 GB (64-bit)
-DirectX 9 graphics device with WDDM 1.0 or higher driver
1 - Check Your Hardware and Software
Download and run
Windows 7 Upgrade Advisor
on the computer you intend to install Windows 7 on. This will give you a general
idea on what hardware/software will work and the ones you may have problems
with.
2 - Which Edition?
Well,
here is the page
that compares all the features of each version. My recommendation, use Windows 7
Home Premium. You'll be tempted to get "Ultimate" because of the name. (I've got
Ultimate because I need to test all the features. )
3 - Do I need an Upgrade or Full
version?
If you intend on installing 7 on a machine that already has a Windows operating
system, and you intend to upgrade (install over it) then get an upgrade version.
Otherwise the license requirement says you need a full version. Yes you can do a
clean install using an upgrade disk (instructions below). Please note, the
Windows 7 license agreement states that if you use an upgrade version then the
OS you installed Windows 7 over is no longer valid. This may or may not be a
technicality based on your own set of morals.
4 - 32-Bit or 64-Bit?
There are
3 determining factors here.
1 - Can your system use a 64-bit Operating System? To find out:
- Download SIW
and run it. In the left pane expand the Hardware section and click on CPU Info.
In the right pane look at the line Number of CPU(s). At the end of that line you
should see "32 bits" or "64 bits". If it is the latter then you can run a 64-bit
OS.
- One thing I have noticed when using the Windows 7 Upgrade Advisor. While it
doesn't straight up say you can run Windows 7 64-bit it will mention 64-bit in
the Hard Drive Free Space and RAM sections if your computer is 64-bit capable.
It does not mention 64-bit if it is not capable.
2 - How much memory do you have? 2GB of memory is the minimum for Windows 7
64-bit, I would recommend 4GB.
3 - Check to see if your hardware the programs you want to install under Windows
7 will work under Windows 7 64-bit. Windows 7 does a very good job at hardware
and program compatibility but there are cases where hardware lacks 64-bit
drivers and software does not work correctly on a 64-bit system. Check the
vendors support site or to a Google search to find answers.
64-bit will perform better if you have the correct driver and enough memory.
Before Installing Windows Seven
1 - Download all your drivers.
To find out all the specifics of your computer and its hardware download
SIW and run it.
You can get the drivers from the website of the manufacturer of you computer
and/or hardware (Google is your friend).
If you cannot find a specific Windows 7 driver for your hardware then download
the latest one for Vista (it is possible it may work).
Once you've got them all, burn them to a CD and/or a USB drive.
2 - Backup any and everything you may
want that is currently installed on the computer. This means to a location other
than the computer that 7 is to be installed on. For a few suggestions on how
look here for Windows
Vista, and
here for Windows XP.
3 - Optional but highly recommended,
Wipe the target installation drive. No self-respecting Geek would ever do an
upgrade install to a new OS. If you insist on doing an upgrade then skip this
step. I usually use an Acronis Disk Director boot disk for this but there are
other tools available. Please note, I do not recommend using any method other
than the installation disk to format
the drive. I've heard scattered reports of problems using other methods.
My preferred method is to backup all my files to an external hard drive (this
is what I have). Then boot computer with either an
Acronis Disk Director boot disk or
UBCD4Win
disk. Once I boot these up I delete and wipe the partitions, then create new
ones (ensure the partition you install 7 on is an active partition). I format
the partitions again from the Windows 7 disk during the install.
Advanced users who aren't afraid of the command line see Windows 7 Installation
Advanced Drive Formatting below.
*Avoiding the 200MB partition: Folks have discovered that on an
unpartitioned drive Windows 7 will create a 200MB system partition. This is
easily avoided by creating a partition before attempting to install Windows 7
(see above). (for some this partition will be 100MB)
*Bitlocker requires this partition. (thanks
to eaglewind for the tip!)
TrueCrypt is a better
alternative.
**Exception for SSD drives to avoid the
200MB partition and partition / format the drive.
Partitioning is a little different for
SSD (Solid State Drives). This is because of something called NTFS partition
alignment. Basically this refers to where on the drive the partition starts.
Vista and 7 will create a single partition optimally for SSD's. XP and most
program boot disks will not. If possible you should partition the disk under an
already installed Windows 7 or Windows Vista machine and then proceed with the
usual installation steps. If not then this is the way to do it:
Windows 7
Installation Advanced Drive Formatting
1 - Boot up from the Windows 7 installation disc.
2 - Choose Repair your computer.
3 - In the System Recovery Options screen, choose Use recovery tools... and
click Next.
4 - Open the Command Prompt.
5 - Type diskpart and hit Enter.
6 - Type list disk . Find the disk you wish to
install Windows 7 on. If you only have one disk then it will show as disk 0. If
you have multiple disks find the drive you wish to install 7 on.
7 - Type select disk 0 (or use the number of
the disk you wish to install Windows 7 on)(note - that is a zero)
8 - Type list partition. There shouldn't be
any.
9 - Type create partition primary.
10- Type select partition 1.
11- Type active.
12- Type format quick.
13- When finished reboot and begin your installation.
(
DiskPart Command-Line Options )
*The above section must have really been good. It has been ripped off around the web.

Please note: This is for a single partition setup. If you need multiple partitions on the SSD then you can shrink the Windows 7 partition after you install.
More info on Windows 7 and SSD's:
Engineering Windows 7 - Support and Q&A for Solid-State Drives
Windows 7 Enhancements for Solid-State Drives (ppt slides viewed thru Google
cache)
MUST READ! Anandtech SSD
article #1 and
article #2.
3a - How I Partiton My Hard Drives
Single disk system - Operating System on first partition - Docs
(libraries) on the second partition made from the remaining space.
Multi-disk system - OS on first drive - Docs (libraries) on second -
Other drives for storage.
Multi-disk system (advanced) - OS on first drive - Second drive, a
second Page File on the first partition (only if it is as fast as the OS drive),
Docs (libraries) on second partition - Other drives for storage.
4 - Consider hardware upgrades.
- Memory - Get 2GB for Windows 7 32-bit, 4GB for 64-bit. SIW (linked to above)
can tell you what kind of memory your system has, look under the Hardware >
Memory section.
Below are sites that have tools to tell you what kind of memory you need.
Newegg Memory Confugurator
Crucial Memory Advisor Tool
Kingston
(Configurator search, upper right)
Corsair
More available through
Google Search.
- Video Card - A 512MB card would put you in excellent position to enjoy
Windows 7. A good place to start looking for which card to buy would be
AnandTech. Check their
Guides / System Buyers Guides and pick your price range. For the more high
end minded folks, you can check [H]ardOCP
and AnandTech
for those reviews and recommendations (good computer hardware advice can also be
found in their forums).
- Hard Drive - Hard drives are generally considered the performance
bottleneck for computers. Get a new bigger and/or faster hard drive. Use that
old hard drive for a secondary drive. Performance enthusiasts should consider a
Solid State Drive (SSD). These are expensive for the cost-per-gigabyte but
man these things fly. (I have the
Intel X25-M G2 ). See,
AnandTech - The SSD Relapse: Understanding and Choosing the Best SSD for a
good read on this topic.
*You can do the above upgrades yourself. They are not complicated, can be done in a few minutes, and usually involve little more than a screwdriver. Take your time and read the guides that come with the hardware (we Geeks call that RTFM). If that guide leaves you confused simply do a Google search, i.e. "how to install a hard drive".
5 - Clean The Inside Of Your
Computer. As anyone who works on others computers can tell you, the inside of a
computer can get quite nasty. I've worked of computers that have left me
sneezing and longing for a shower. Cleaning your computer can reduce heat inside
the box allowing it to last longer (heat is the enemy of a computer).
Bleepingcomputer has a good guide.
Installing Windows Seven
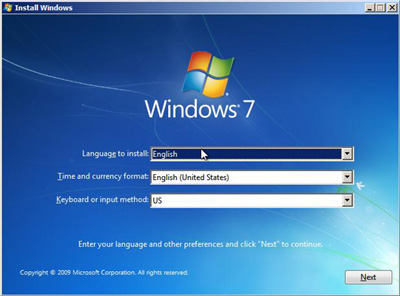
Installing Seven is almost idiot proof. I will show just a few select
screenshots. Pop in the DVD and let'er rip. The few questions you have to answer
are straight forward.
Partition Sizes: Officially listed as 16 GB available hard disk space (32-bit)
or 20 GB (64-bit). I would recommend 30 GB as a good size for a partition, more
if you have the space. Remember once multiple partitions are set up, it is
easier to make the partition larger than you think you need at the beginning and
shrink it than it is to make a minimum size partition and have to enlarge it
later. (please see How I Partiton My Hard Drives above for how I do my
partitioning)
Clean Install ( I recommend using these steps regardless to whether or not you
have a full or upgrade disk)
You cannot do a clean install from an upgrade disk.
There are several workarounds. See:
Paul Thurrott - Clean Install Windows 7 with Upgrade Media
I would recommend doing it as he describes in Method #1:
1 - Wipe drive/partition (see above for partitioning recommendations)
2 - Install Seven. If using an upgrade disk, DO NOT ENTER YOUR KEY
3 - If using an upgrade disk. On first boot,install your drivers then run
Windows Update until there are no more updates.
4 - In the start menu search box type activate
, enter your key and then activate Windows.
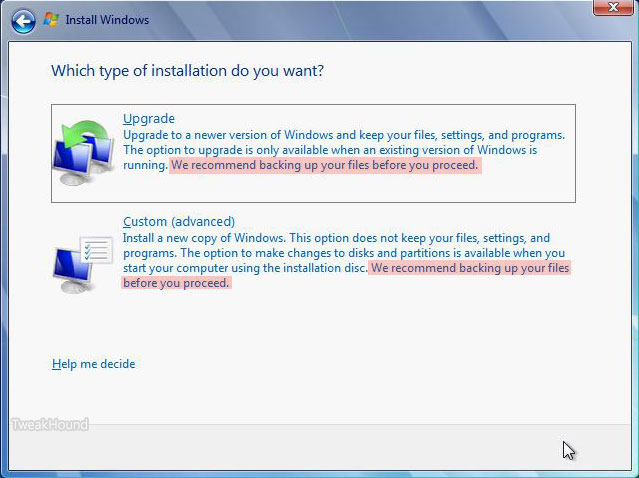
Choose Upgrade or Clean Install.
To do a clean install click on Custom
(advanced).
As stated above I highly suggest a clean install. See the backup warnings???
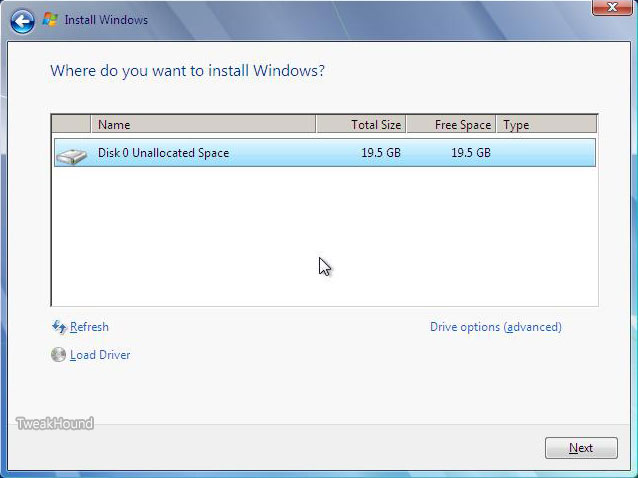
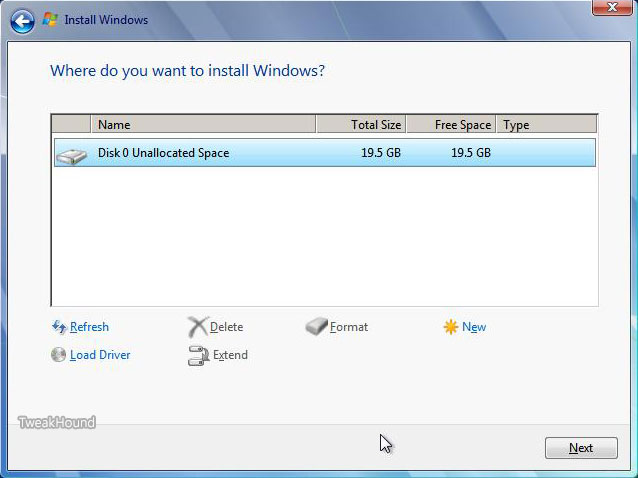
Click on Drive
options (advanced) to be able to format your partition.
Got RAID or is your disk not showing up? Click
Load Driver.
First Boot
If you are going to disable UAC the do so now (see below for how).
Uninstall stuff you
aren't going to use.
Open the Control Panel:
- From the default screen - Go to Start > Control Panel > Programs > Uninstall a
program > Turn Windows Features on or off
- Better option, switch view to Large Icons (look on the upper right of the
Control Panel window for "View by:" Then go to Programs and Features > Turn
Windows Features on or off.
- Fastest way - Press the Windows + R keys and type
appwiz.cpl > Turn Windows Features on or off.
Deselect (uncheck) things you don't want. What is available depends on the
edition of 7 you have. If you see something listed here that isn't in your list
don't worry, you don't have it. I choose to uninstall:
-Games (all)
-Print and Document Services (all) (careful, check out the individual
parts)
-Remote Differential Compression
-Tablet PC Components
-Windows Search (only if you aren't going to use indexing)
Click OK and then reboot if prompted
Install Drivers
tip #1 - To quickly access Device Manager, hit the Windows + R keys and type
devmgmt.msc
tip #2 - In Device Manager, if an item has an exclamation icon then it needs a
driver.
The order I use to install drivers is:
-Chipset
-RAID and/or other drivers involving storage
-Graphics
-Sound
-LAN
Setup Advanced
Cleanup
Press the Windows + R keys, type cleanmgr /sageset:50
.
Select the options you desire, I choose them all. Click OK and close out the
window.
Press the Windows + R keys, type cleanmgr /sagerun:50
.
(note - there is a space between the r and the /)
* You can use this command at any time for regular disk cleanups. I use the
number 50 because it is easy to remember, you can use any number you want.
*tip - this works in Safe Mode too.
Windows Update
Run it and keep running it until all Critical Updates are installed and any
Optional Updates you want are installed. Updated drivers may be available too.
Backup - Make An Image (I used an Acronis TI Boot Disk)
(please note I did not say install a backup program (yet). Both Acronis True
Image and Norton Ghost have the ability to make boot disks)
Install Your Programs
***Very important.
If you intend to disable User Access Control (UAC) as I have then you should do
this BEFORE YOU INSTALL ANY PROGRAM. Not doing so can lead to problems later.
To Disable UAC:
- Type or copy and paste
UserAccountControlSettings.exe
into the Start menu search box.
- In the resulting window, move the slider all the way to the bottom.
- Reboot
PAY ATTENTION to what you are installing (in other words, don't keep clicking
Next). Don't install more than you need. Don't install toolbars or let it change
your home page either. Decide what apps you want to do what. For instance:
I use Winamp Lite (and I use a very basic install for that) as the Default for
playing .wav and .mp3 files because it opens faster and with a smaller footprint
than say Windows Media Player or iTunes. Also, I have no application launching
when I insert a music CD or DVD either.
Major Applications
I recommend you install the major applications first (i.e. anti-virus, software
firewalls, Office, and the applications that come with your hardware). Always
use the custom or advanced installation method and pay attention to the options
screens. I install all the applications to the same drive as the OS. That is
because I use backup program, and use it often! Pick and choose the parts you
install carefully. If you don't
install it. Avoid allowing anything that isn't necessary to "load at startup." As you install each application,
download (if you haven't already) and install all updates and
patches before you move on to the next application. I prefer to load my backup
program first and make an image before I go further. The very next thing I
install is anti-vrus software.
Minor Applications
Next install the minor applications (Sound, graphics, utilities,
etc.) Check for the most recent versions first. Before you install
them, decide which applications you want to perform what. If you have multiple
applications that can do or play the same thing, decide which you prefer. For
example; I have Windows Media Player, Winamp, MediaMonkey, and iTunes all
wanting to be the default player for many of the same files. If not configured
properly, they will fight for dominance. Giving each player
it's own default settings doesn't mean you
can't ever play it in another application. After you install
each application, open them and double check configuration settings, some
applications don't play nice!
Use cleanmgr /sagerun:50 again!
Move Your Libraries
This is a critical step in the way I set up computers. A problem free backup /
restore process depends on you having your docs, music, pics, etc. on a drive or
partition other than the one Windows 7 is on. Using this method you do not have
to worry that some issue (virus, crash, hardware failure, etc) will mean losing
your data.

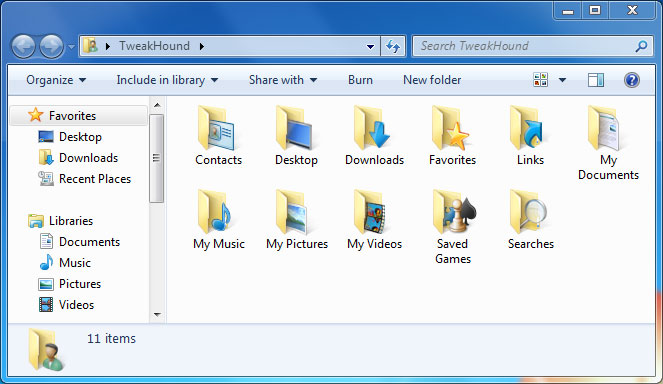


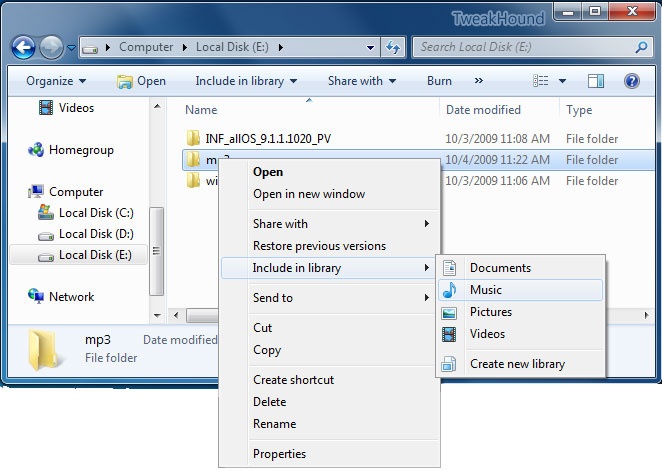
All your files do not have to be in the actual library folder. Windows 7 lets
you add folders from other locations to your library without actually moving
them into the actual library location.
Configure Your Email
If your ISP software didn't do it, configure your email now.
Configure Programs That Start With Windows 7
Get everything you possibly can out of the System Tray (by the clock in the
lower right hand of the screen). The best way to do this is in the applications
options. If that fails, use Autoruns.
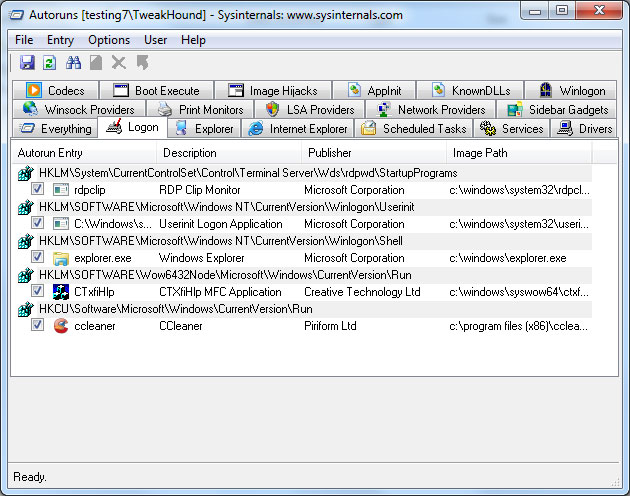
Autoruns
Download Autoruns.
Extract the folder to your root drive (usually C). Open the Autoruns folder and
double-click autoruns.exe. Click on the Logon tab, Uncheck anything you do not
want to start with Vista. The fewer things the better. If you
don't know what it is, leave it alone. Advanced users may want
to go to the SERVICES tab and make modifications there.
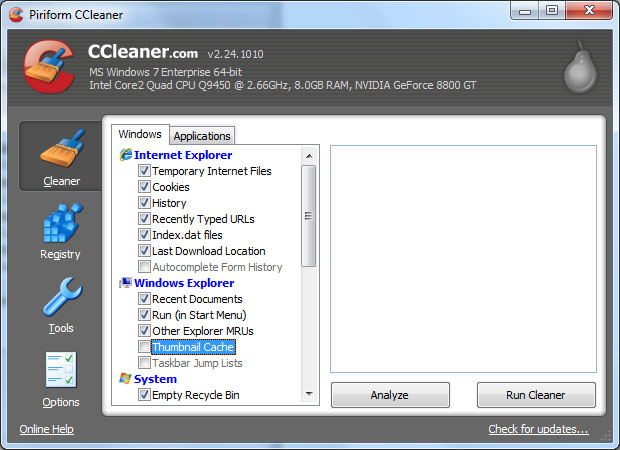
CCleaner
Download and
install CCleaner Slim.
Configure it - Poke around and choose your options (I enable Run CCleaner
when the computer starts).
Run it.
Final Cleanup & Defrag
- Start up in Safe Mode and use cleanmgr /sagerun:50 again!
- Run CCleaner.
Next, go to START > ALL PROGRAMS > ACCESSORIES > SYSTEM TOOLS > DISK
DEFRAGMENTER. Highlight the drive you installed Windows 7 on, click the
DEFRAGMENT button. This will take a while. When finished shut down and restart.
Get there faster: type dfrgui in the Start Menu
search box.
Backup
Whatever backup method you prefer, make a backup.
You're done!
Tweaking Windows 7
Installing Windows 7
TweakHound's Super XP Tweaking Guide - SP3 Final
Tweaking Windows Vista
The Right Way To Install Windows XP
Installing Windows Vista
The
Freeware XP Machine
The Vista
Freeware Machine
Windows XP
Backup Strategies For Home Users
Windows Vista Backup Strategies For Home Users
Installing
Suse Linux 10.3
How To Samba With openSUSE 11.2 and Windows

I use True Image 2011 for all my OS backups and Disk Director 11.0 for all my partitioning requirements.
TweakHound readers often get a discount off Acronis Products. Check the links for more info.