It's time to have a little fun!
This article will show you what I did to customize the look of Windows Vista. I'll cover: Icons, Skinning, and the Sidebar & Gadgets.
I spent almost 2 weeks trying out various programs and techniques. The goal of this article will introduce you to some of the better and easier options available.
WARNING - Backup your system with a full backup IMAGE before attempting to follow anything in this guide.
*Before you start. You are going to need some kind of image editing software. IMHO the best free option is Paint.NET.
**About images: The cool thing about creating and editing images FOR YOUR OWN USE is you can pretty much use any image out there. Please respect others work by respecting their copyright and/or distribution restrictions.
Article comments go in the Blog post here: Customizing Windows Vista
Article Index
----------
Customize The Way Vista Looks - ICONS & BRANDING (The Free Options)Changing Your System Icons
For this we'll use a free program called WinBubble.
Links:
Download it from Major Geeks
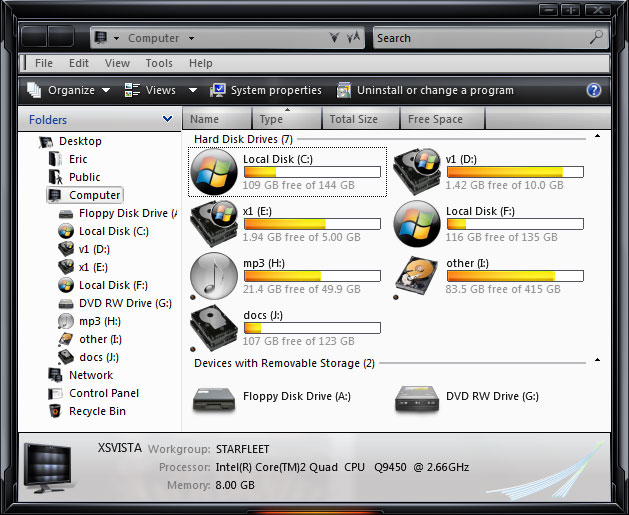
With WinBubble you can change the following icons: Hard Drive Icons, Documents, Pictures, Favorites, Music, Videos, Contacts, Computer, Control Panel, Network Neighborhood.
Where to find icons: DeviantArt icons, in partcular the OS/Windows icons, and the Dock icons sections. DeviantArt is highly searchable. Lets say you want to search for "black" icons in the Dock icons section, it would turn up this result.
You are going to want icons that are in .ICO format and sized at 256x256 pixels. The 256x256 size is the max size. ICO files can contain multiple sizes embedded in the file and you should try to find icons created as such for best viewing experience. For best viewing results I prefer to make my own icons. I do it like this:
1 - Find the icon(s) I want in .PNG format.
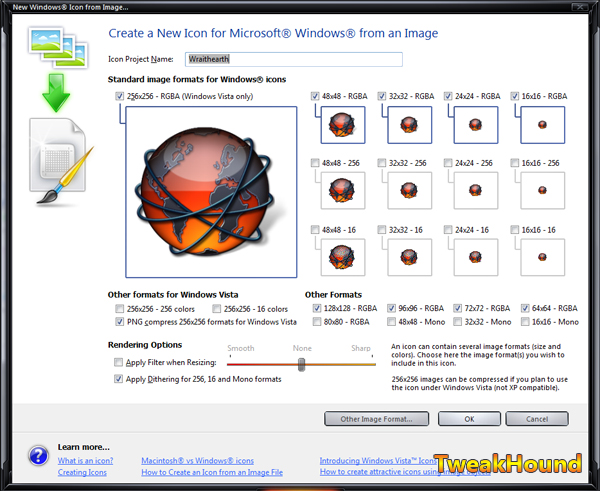
2 - Edit and size the icons. I tried every freeware version of PNG to ICO converters I could get my hands. Every one of them had issues ranging from not doing multiple sizes, to not doing 256x256, to not running under Vista and/or Vista 64-bit. In the end I settled on the free 30-day trial of Axialis IconWorkshop. It is a truly awesome program. Rather than explain the settings I used I'll just show you:
Lets make sure we save and backup our icons. Create a folder in the root of your C drive called systemicons and put all the icons you created/downloaded there ( C:\systemicons ). Once complete copy that folder to a backup location.
On to WinBubbles.
Open WinBubble and follow the steps in the picture below:

Got a Floppy drive? There is no A or B drive option in WinBubble. You will have to do it manually. I found excellent instructions here: Drive Icon Change
Icons for Special Folders
You can change the icons for any folder in Vista. Though it really isn't necessary or practical to manually change every folder there may be folders you want to add a special touch to.
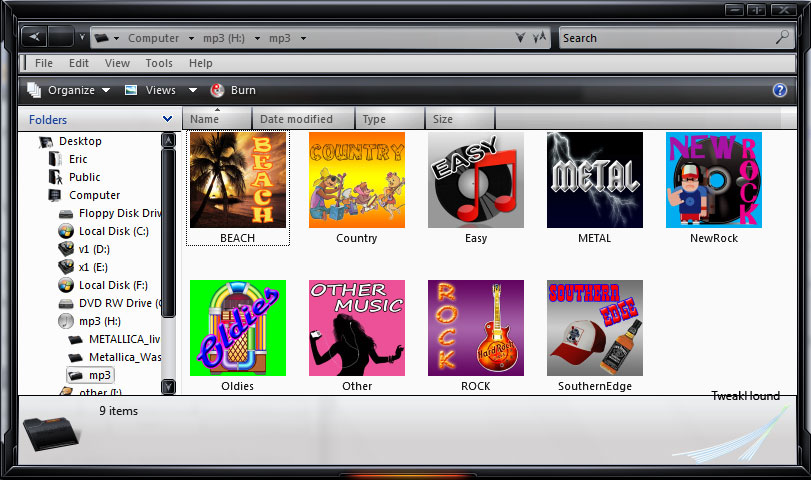
I keep my MP3's divide into folders based on Genre ( I create my own genres too but that is another story). In this example I created folder icons using the method above. I stored both the PNG and the ICO files in the actual folder it was being applied to. In other words the icon (and png) for the Metal folder was put in the Metal folder.
(Just FYI there is a good set of music genre icons here: http://wizzyloveszebras.deviantart.com/art/What-kind-of-music-are-U-2-82795551 )
To change the icon for a folder, right-click on that folder and choose Properties. In the resulting window click the Icon tab. Click the Change Icon... button and browse to the icon you want and click the Apply button.
What my folder looks like;
Branding Your Computer
Not a real big deal here but heck, it's kinda fun.
Changing the OEM logo. You can make or use any image you like, but:
- It must be saved as a BMP file (bitmap)
- It should be square to avoid stretching. Every guide I've seen says it needs to be no bigger than 120x120 pixels but mine is 200x200.
- Save the image in a folder you won't move. I just stuck my right in the root of the C drive ( C:\imagename.bmp )
Open WinBubbles and follow the steps in the picture below:
Press the Windows + Pause Break keys to see the changes! ( System Properties ).
Changing The Users Icon
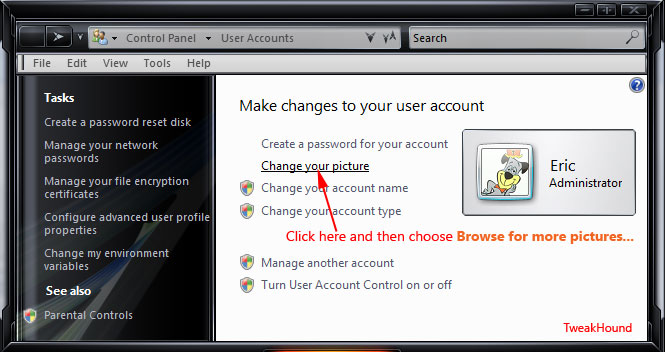
Go to your User Account:
If you are using the new style start menu simply click on the user icon.
If you are using the classic start menu press the Windows + R keys, copy and paste this into the box RunDll32.exe shell32.dll,Control_RunDLL nusrmgr.cpl , and Press OK.
Next click Change your picture and the choose Browse for more pictures...
For best results I would use a picture that was a PNG file and sized at 120x120 minimum or 200x200 maximum.
Again, I save the picture to the root of the C drive ( C:\imagename.png ).
Article Index
Tweaking Windows 7
Installing Windows 7
TweakHound's Super XP Tweaking Guide - SP3 Final
Tweaking Windows Vista
The Right Way To Install Windows XP
Installing Windows Vista
The
Freeware XP Machine
The Vista
Freeware Machine
Windows XP
Backup Strategies For Home Users
Windows Vista Backup Strategies For Home Users
Installing
Suse Linux 10.3
How To Samba With openSUSE 11.2 and Windows

I use True Image 2011 for all my OS backups and Disk Director 11.0 for all my partitioning requirements.
TweakHound readers often get a discount off Acronis Products. Check the links for more info.